
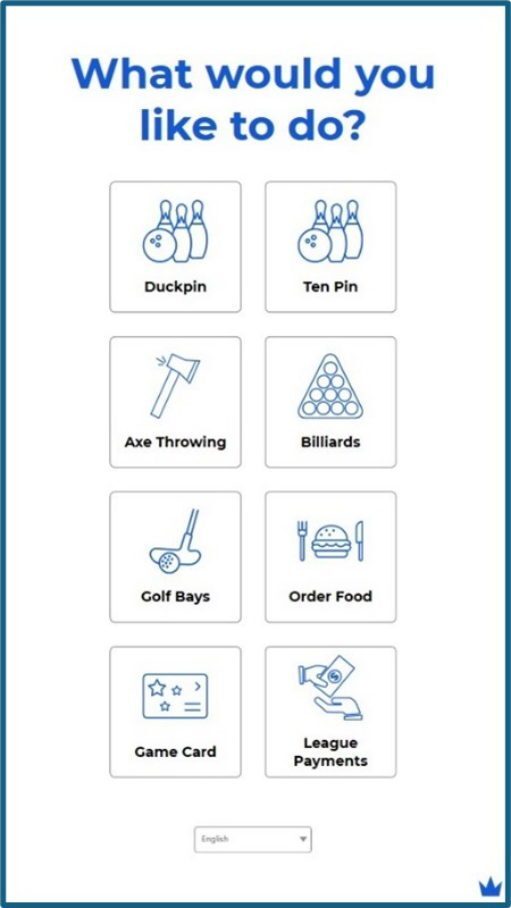
Selling attractions on your kiosk is an easy and efficient way to turn a guest’s bowling or single attraction visit into a multi-hour stay at your facility. By having additional attractions accessible at the tip of their fingers, the guest is more likely to add an additional experience to the one that they had previously planned to purchase. They might be at your facility to play a couple of games of duckpin, when they notice that you also have Golf Bays available.
- Kiosk Attraction Settings
- Employee Flow
- Waitlist
- Reservations
- Example Guest Flow
- Upsell Suggestions for Attractions
- Digital Waivers
- Waiver Set Up
- Waivers – Guest Flow
Kiosk Attraction Settings
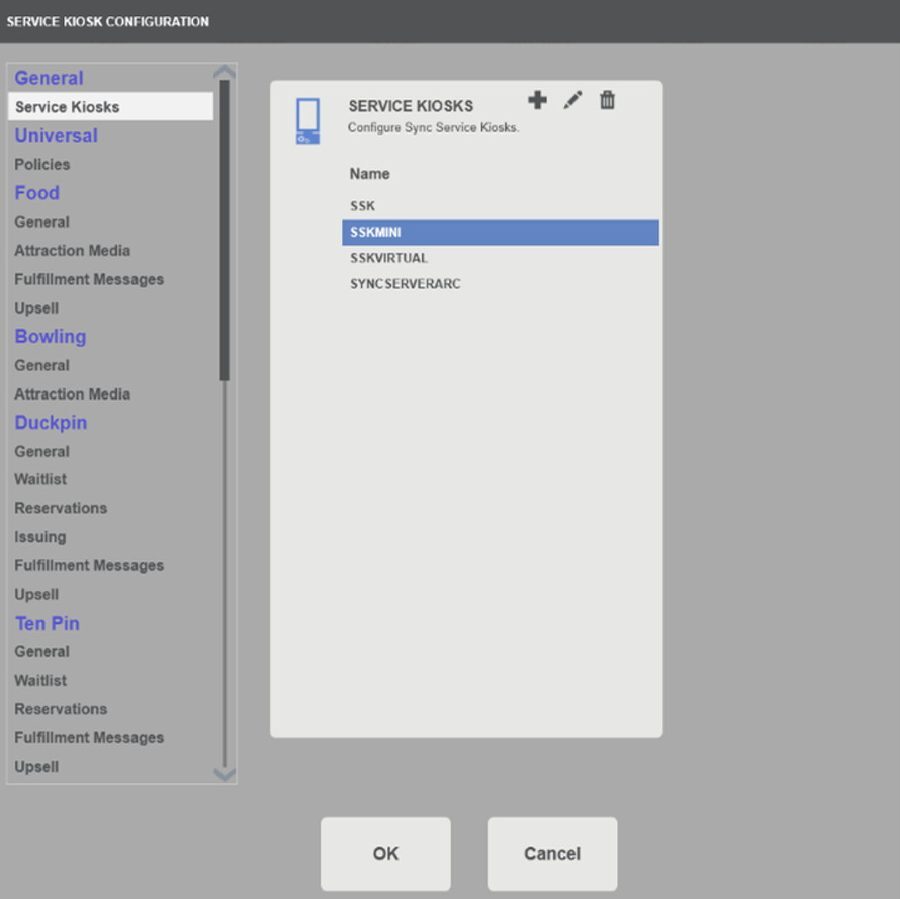
- Enable your SSK to sell attractions by navigating to Admin > Service Kiosks. Once here, pictured below, double click on the name of the kiosks that you would like to edit.
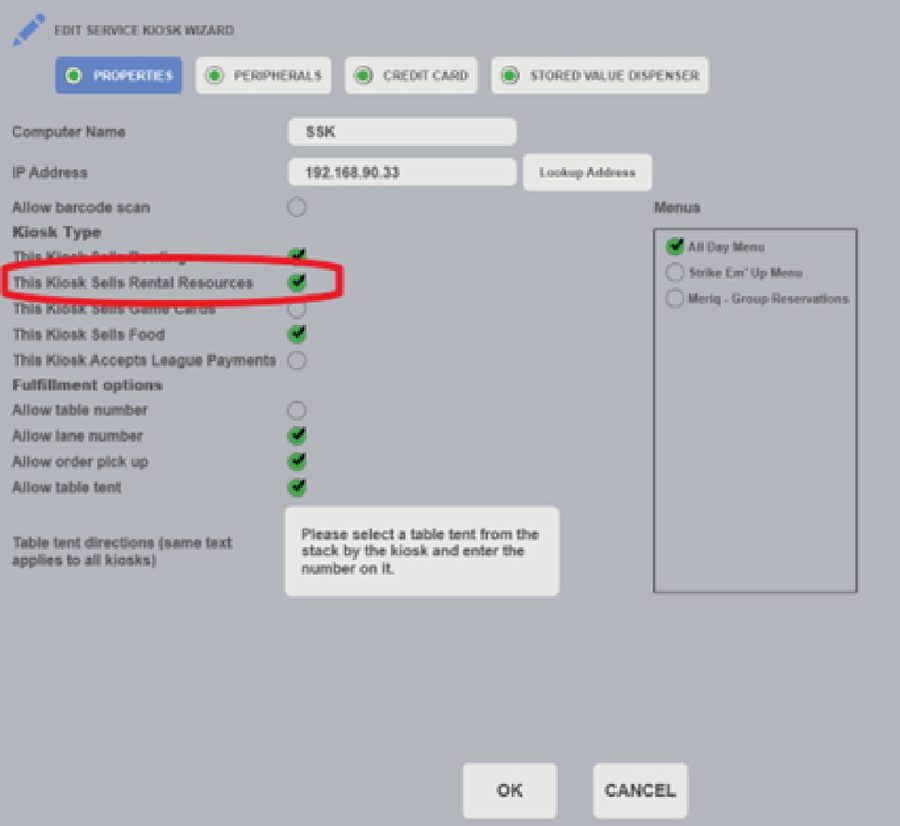
- Check the bubble next to “This Kiosk Sells Rental Resources”.
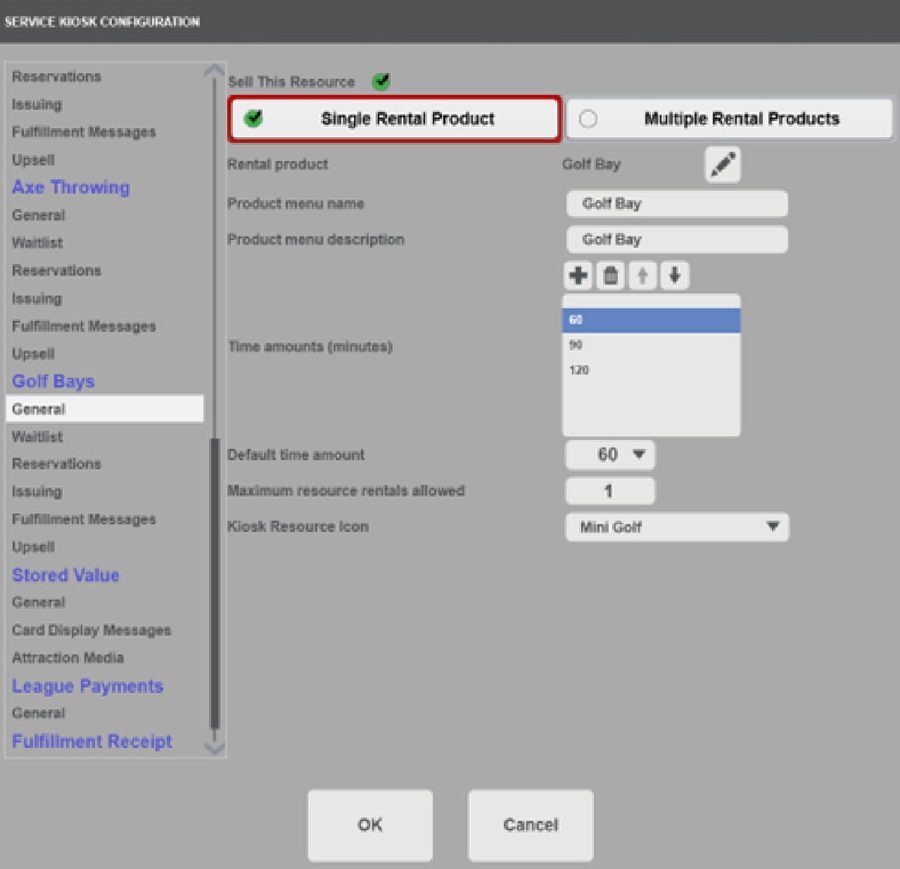
- Using the Single Rental Product options allows you to see a timed rental product with multiple time options.
Employee Flow
Waitlist
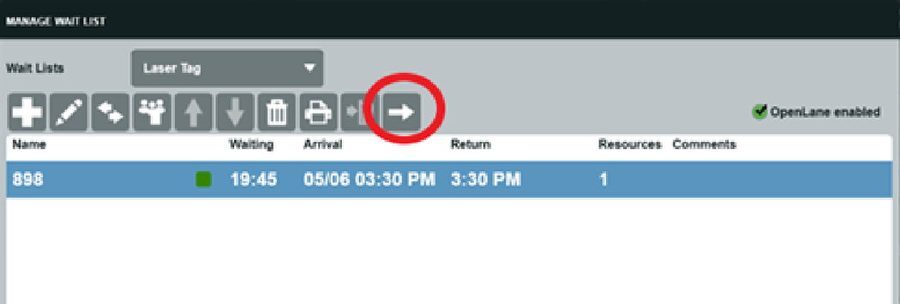
If a guest chooses to ‘play now’, their party ticket will be placed inside of the waitlist manager. Kiosk waitlist entries will appear with a green square indicating that the guest has already paid.
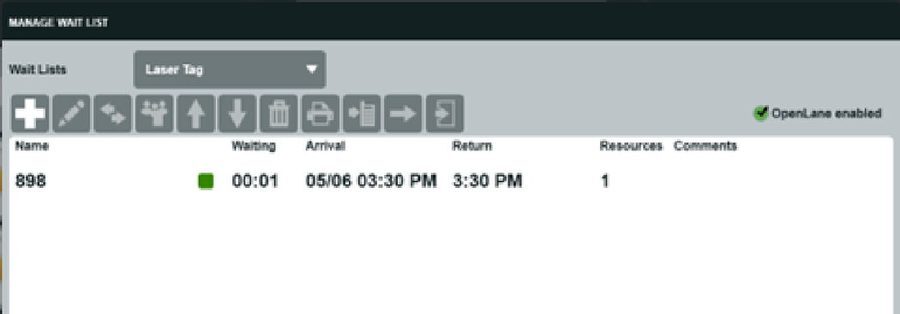
Selecting the desired party and tapping the arrow pointing to the right of the screen will begin the hosting process.
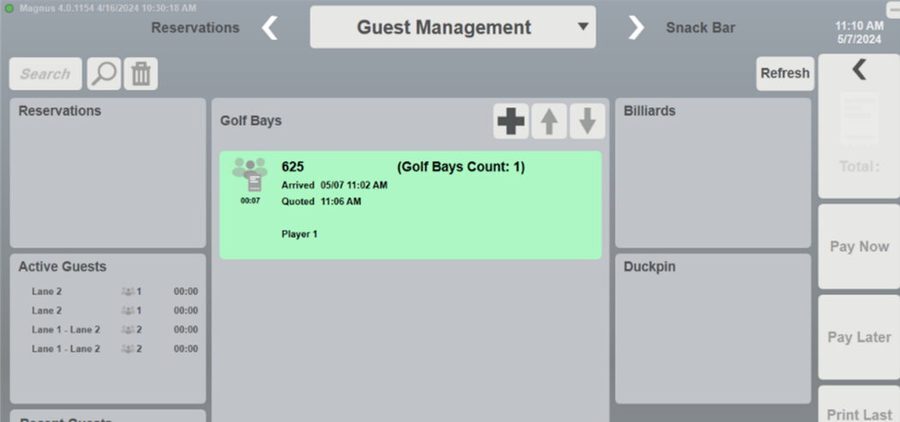
Alternatively, the waitlist entry will also populate to the Guest Management Panel.
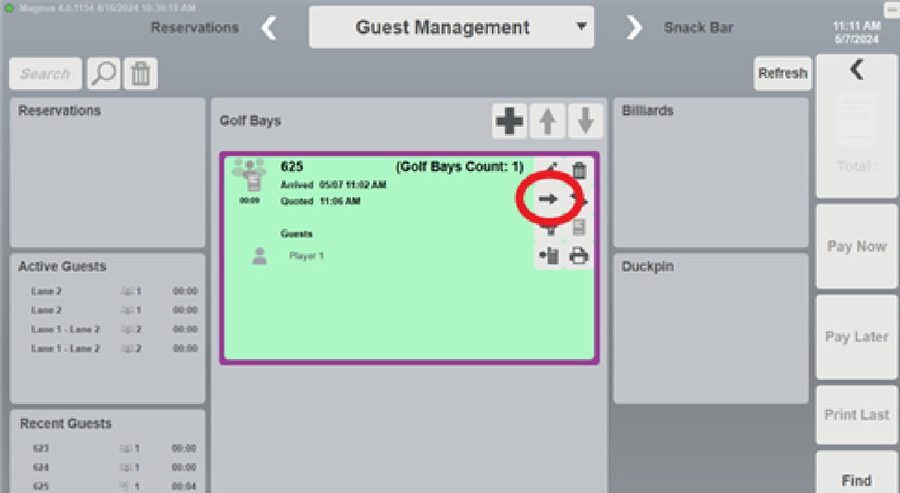
Selecting the desired party and tapping the arrow pointing to the right of the screen will begin the hosting process.
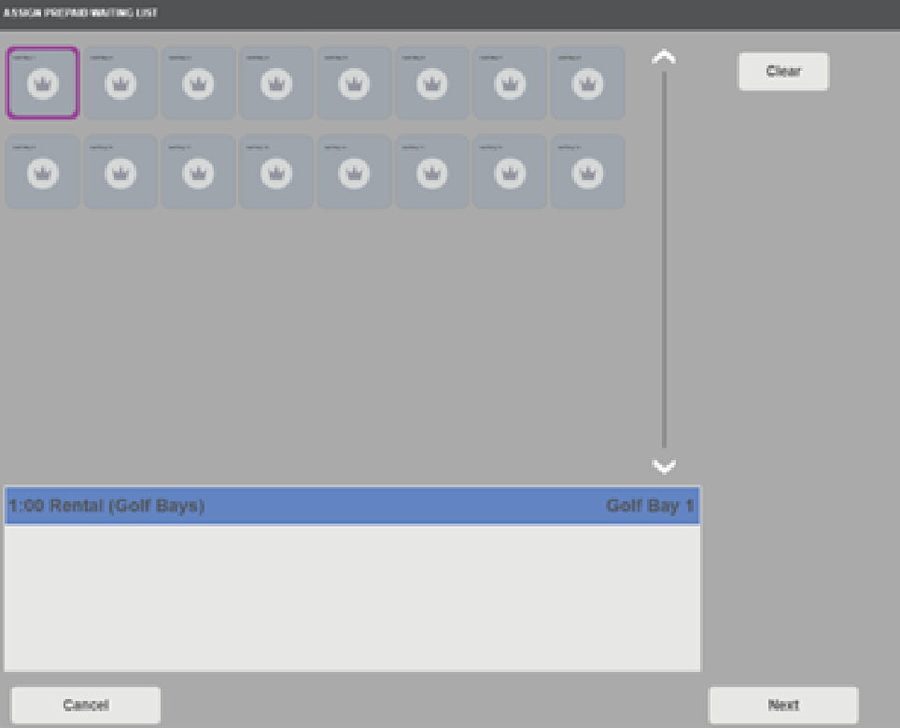
Hosting the party, either from the waitlist or the guest management view panel, will bring up the Assign Prepaid Waiting List screen. From this screen you can assign the party to an open resource by highlighting the name of the party, selecting an empty tile in the upper half of the screen, and clicking Next in the bottom right-hand corner of the screen.
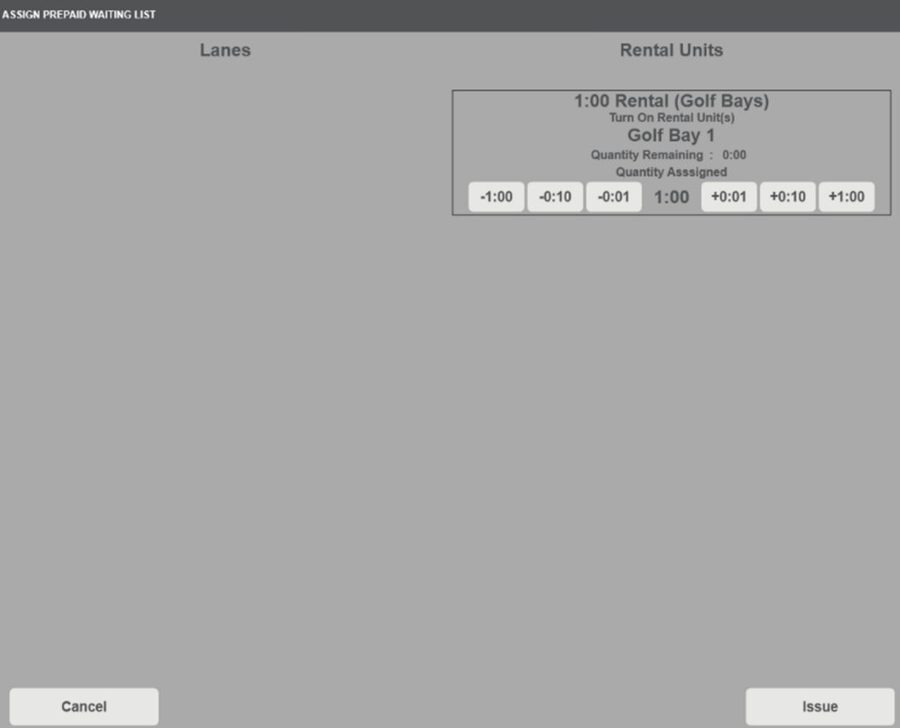
The next page will confirm the type and number of resources. If everything appears correct, click Next in the bottom right-hand corner of the screen.
Reservations
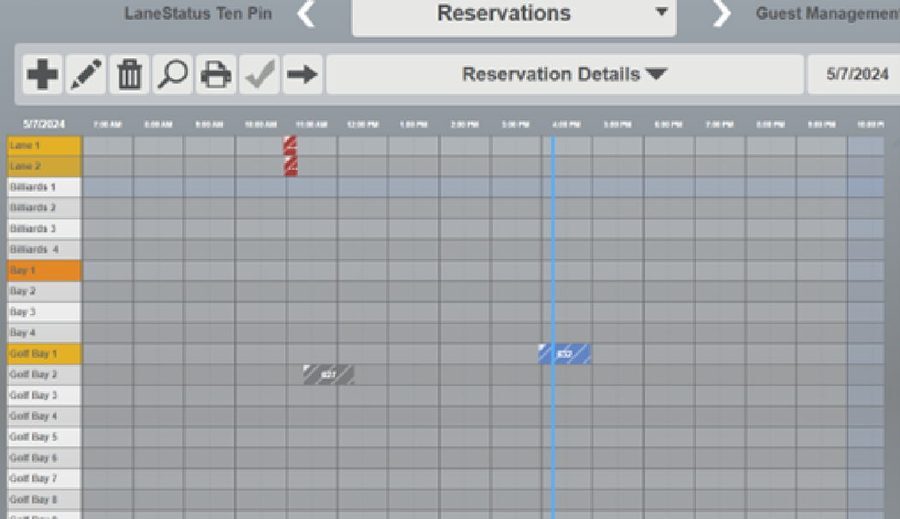
If a guest chooses to make a reservation for a later time, their party ticket will be placed inside of the reservation panel. A red square will appear in the upper left-hand corner of the screen to indicate that a new reservation has been sent to the POS.
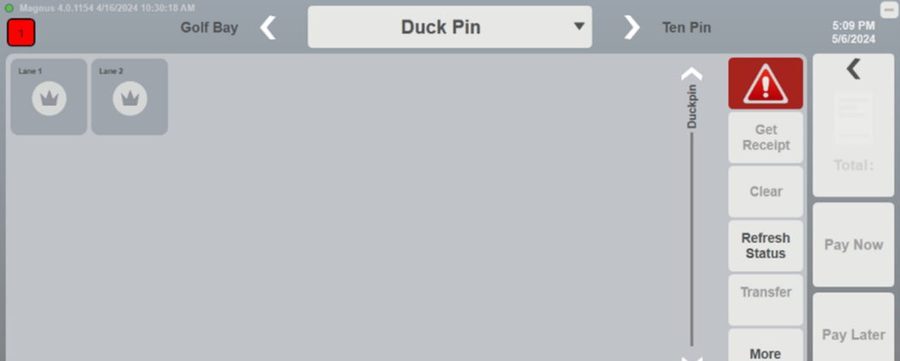
Clicking the red square will take you directly to the reservation view panel. Select the reservation and click the arrow pointing towards the right-side of the screen.
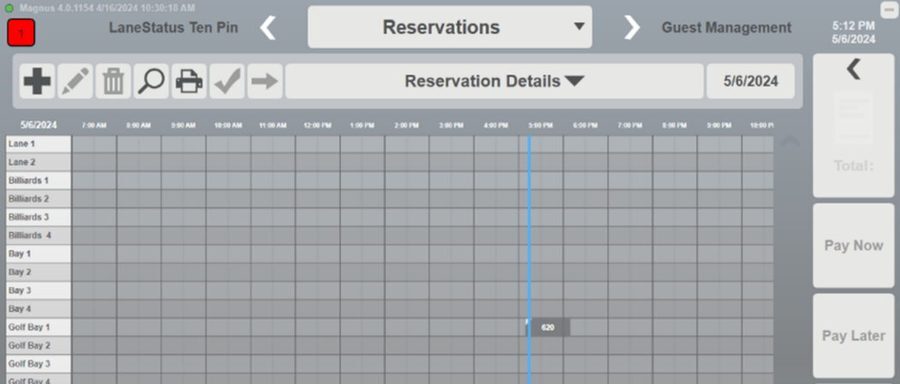
Alternatively, the reservation will also populate to the Guest Management Panel.
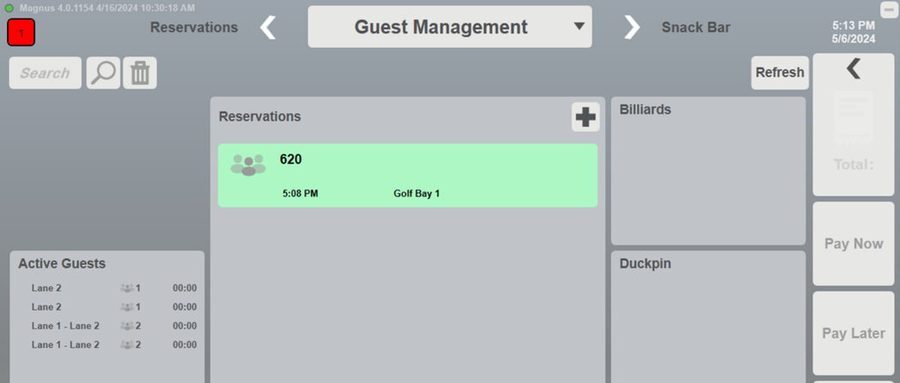
Selecting the desired party and tapping the arrow pointing to the right of the screen will begin the hosting process.
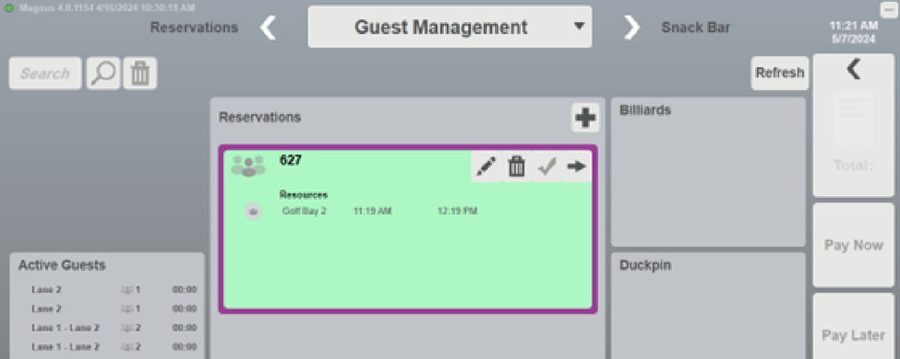
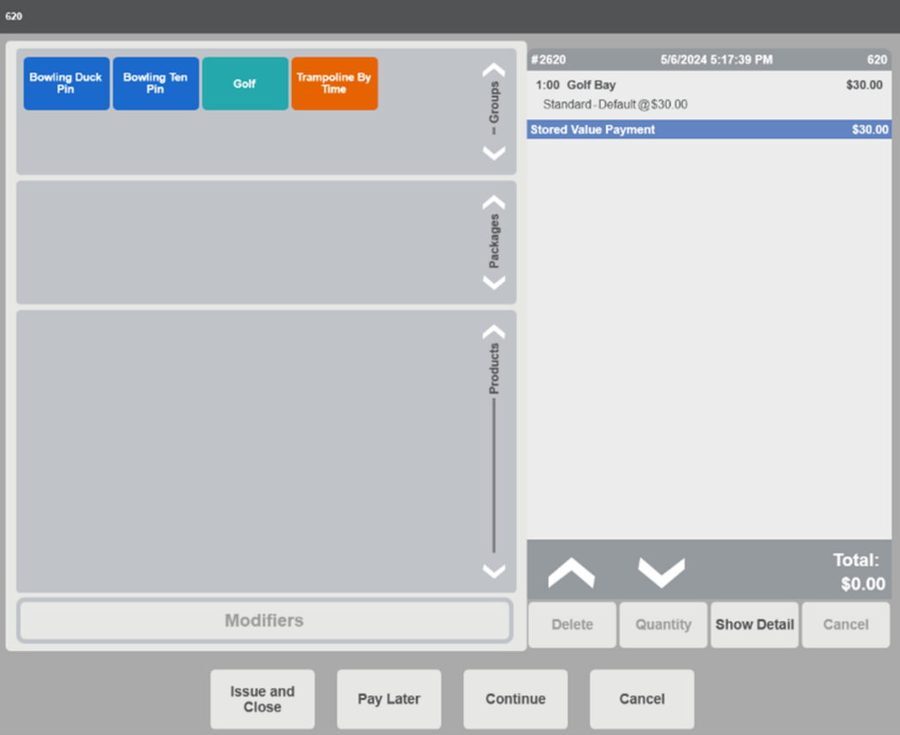
Hosting the reservation, either from the waitlist or the guest management view panel, will open the reservation details. From this screen, you can either,
- Issue and Close – issues the reservation and closes the transaction
- Pay Later – starts a tab and issues the reservation
- Continue – issues the reservation and leaves the ticket open
- Cancel – returns to the Guest Management view panel
Choosing options 1-3 will bring up the Assigned Prepaid Waiting List page. From this screen you can assign the party to an open resource by highlighting the name of the party, selecting an empty tile in the upper half of the screen, and clicking Next in the bottom right-hand corner of the screen. The next page will confirm the type and number of resources. If everything appears correct, click Next in the bottom right-hand corner of the screen.
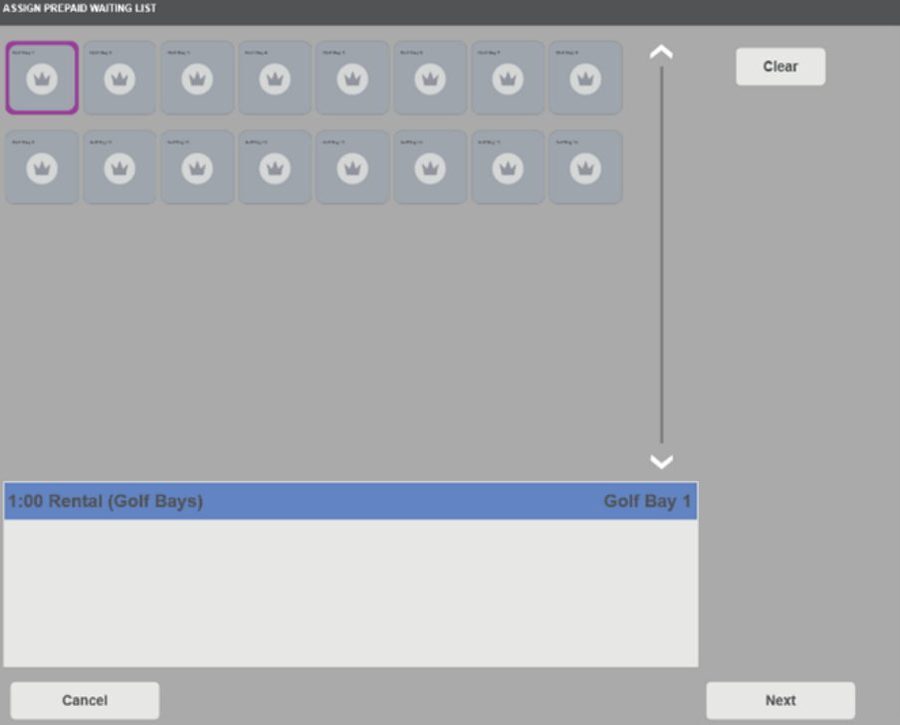
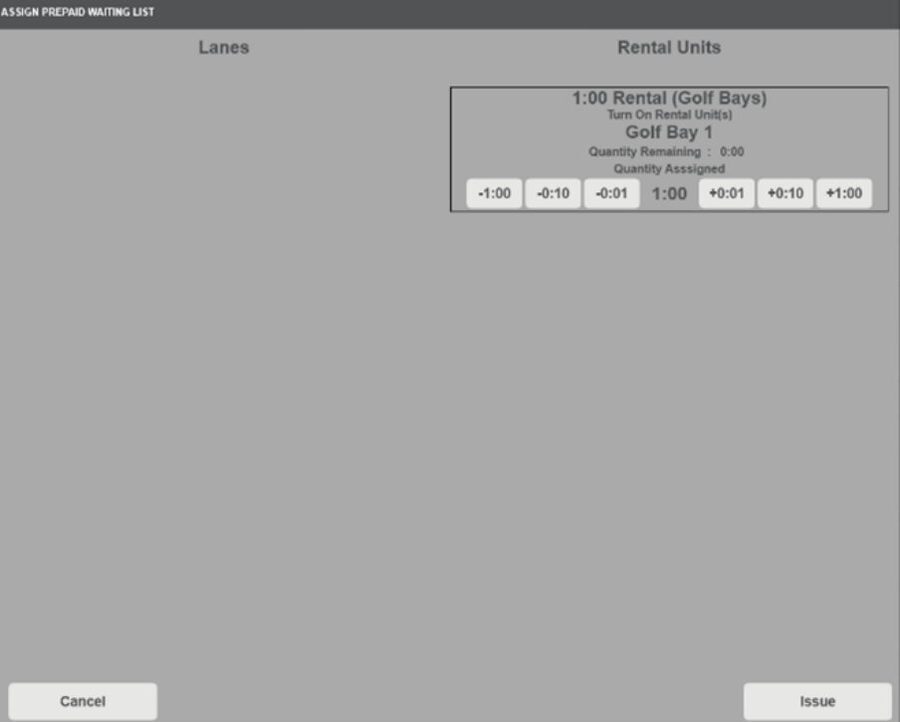
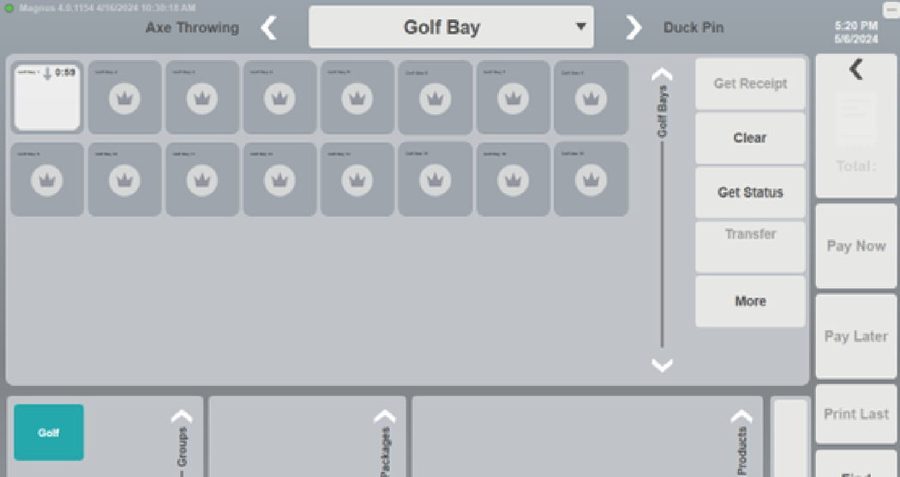
Voila! Your reservation has been hosted to the appropriate view panel.
Reservations that have already been hosted will display slash marks through their reservation rectangle inside of the reservation view panel.
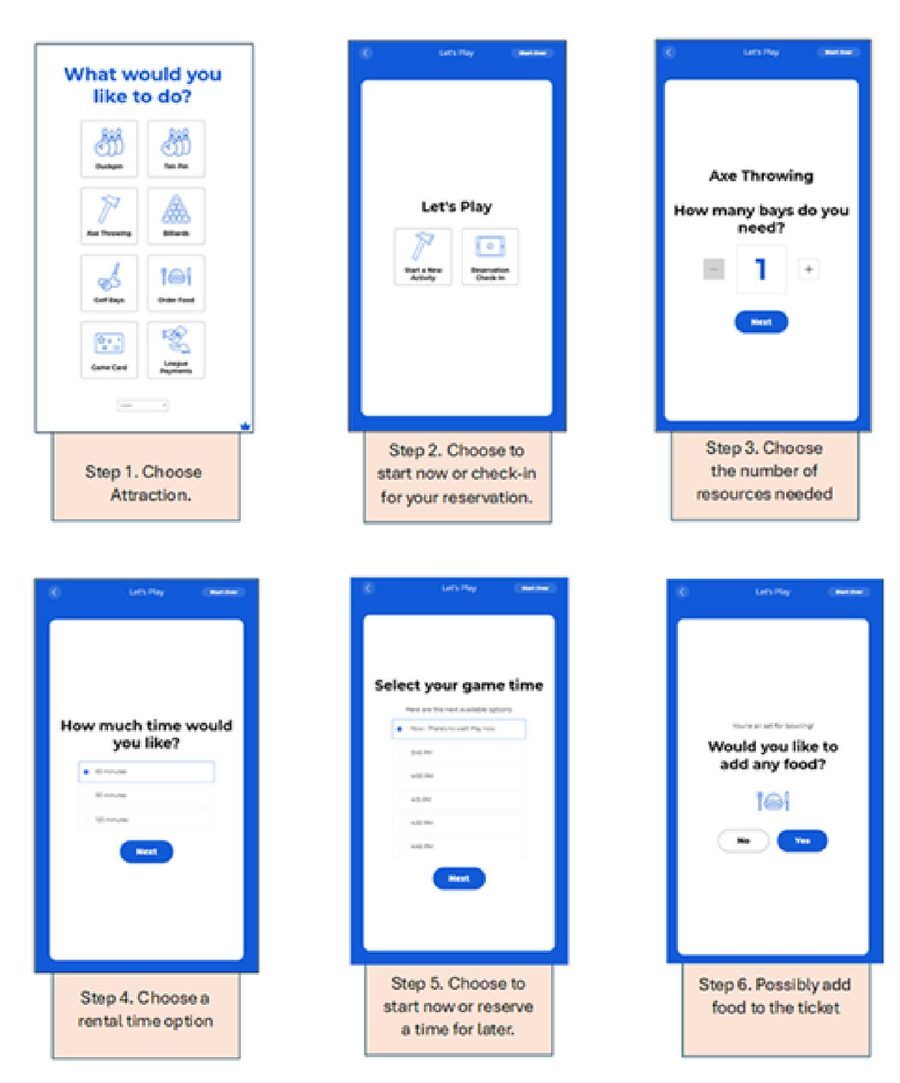
Example Guest Flow
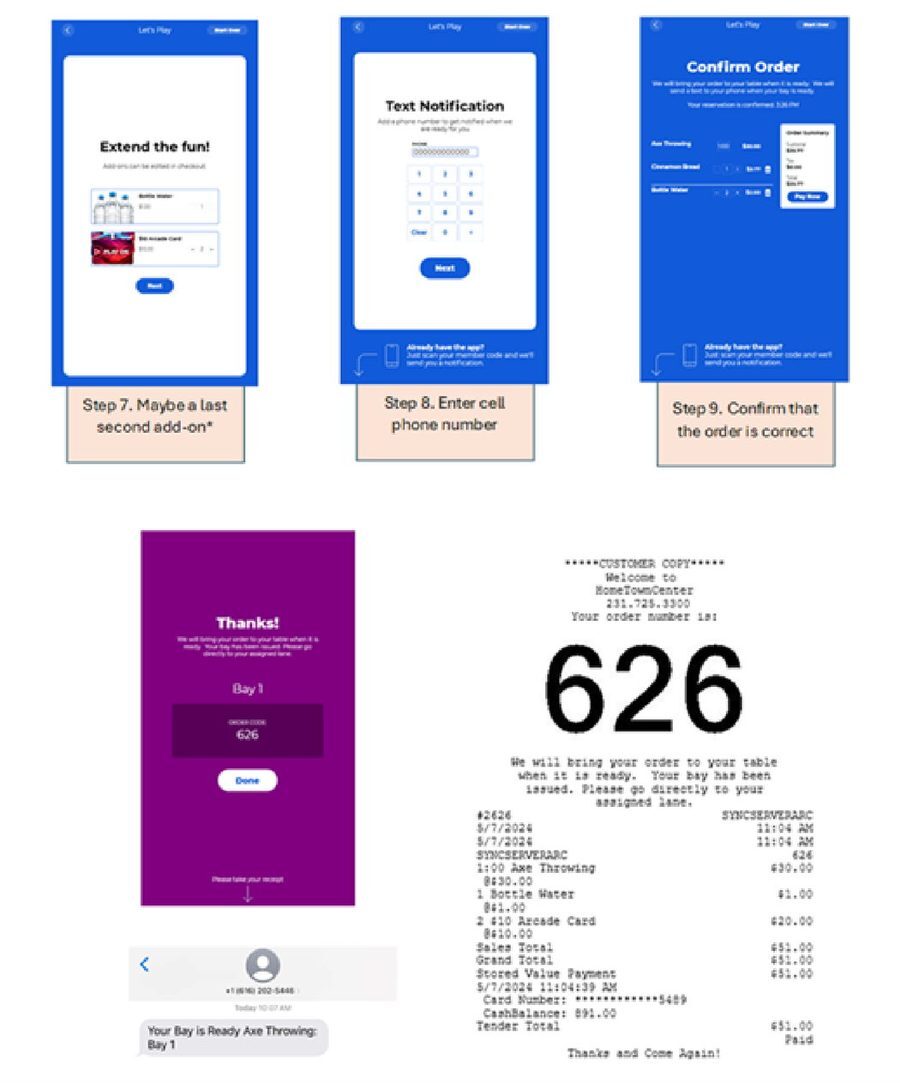
Upsell Suggestions for Attractions
Since a lot of attractions do not include tables, it is pertinent to cater your upsell suggestions to those restrictions.
- Arcade Cards – Encourage your guests to stick around and visit the arcade once their attraction is over.
- Bottled Waters – Attractions, such as laser tag and axe throwing, can work up a sweat. Why not offer a refreshing beverage? Better yet, a pre-packaged bottle of water. That’s a quick & easy upsell!
- Handheld/prepackaged desserts – Cookies, brownies, candy, etc. Any treat that can be placed in a pocket or a purse while the guest takes their turn on the putting green or battles zombies in the arcade.
Digital Waivers
Waiver Set Up
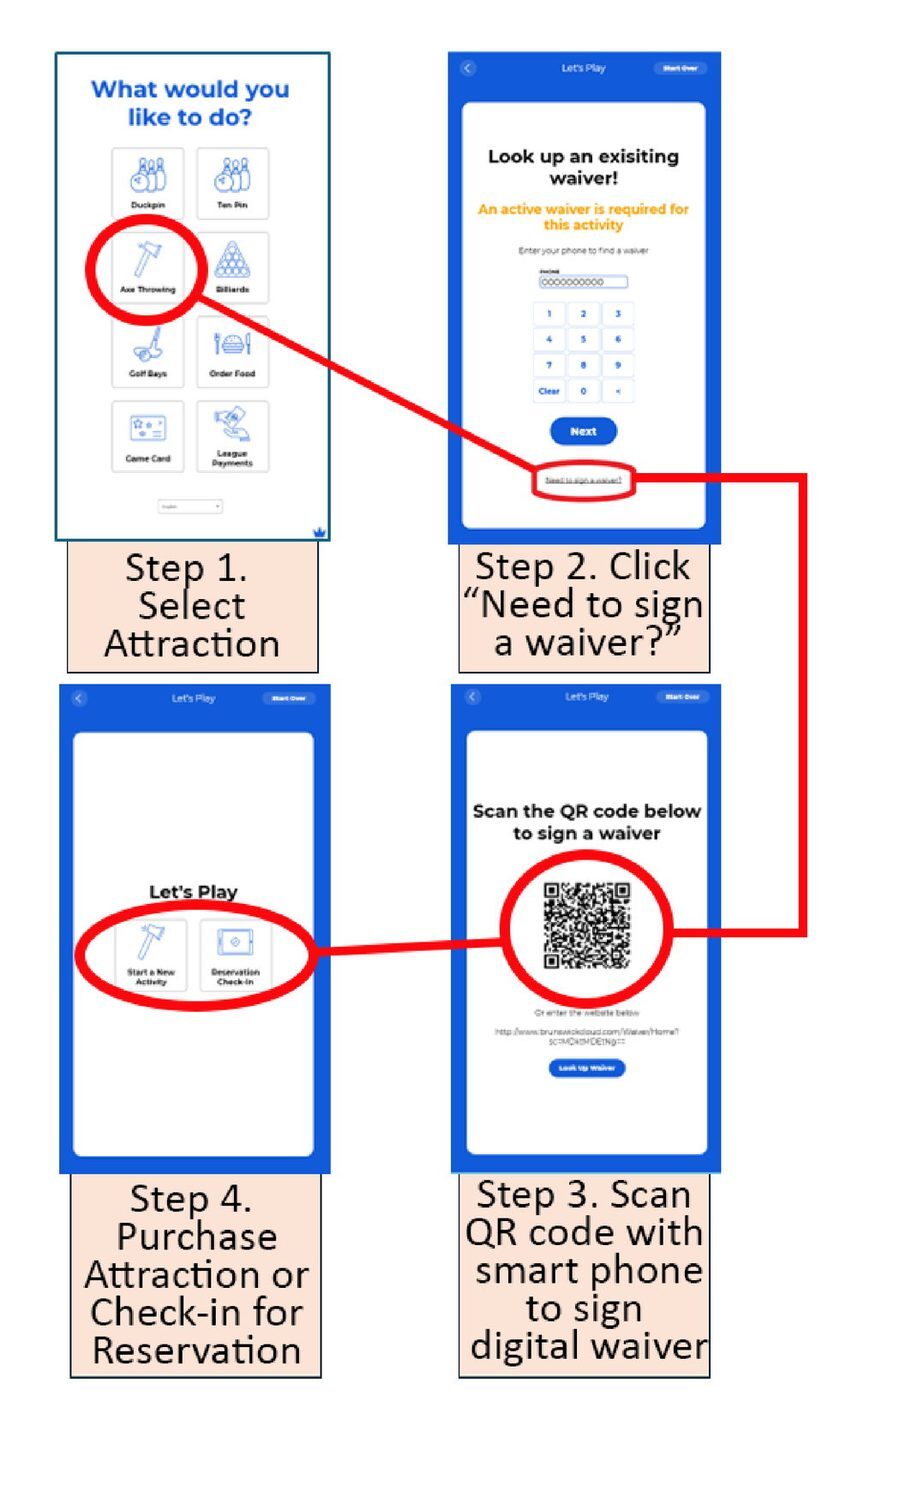
Digital Waivers can be utilised by the SSK to confirm that your guests have agreed to the rules and liability of your attraction offerings.
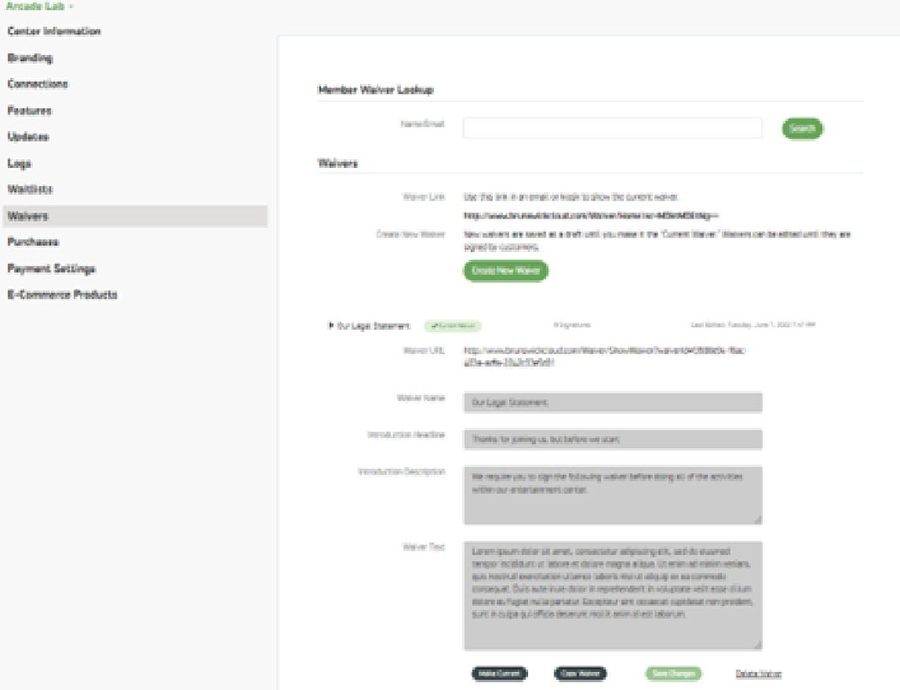
To upload your waiver, log in to your Brunswick Cloud account and navigate to Centers > Waivers. Once here, pictured below, you can enter your waiver copy and make current. The URL displayed at the top of this page is the landing page where your waiver can be found and signed by guests.
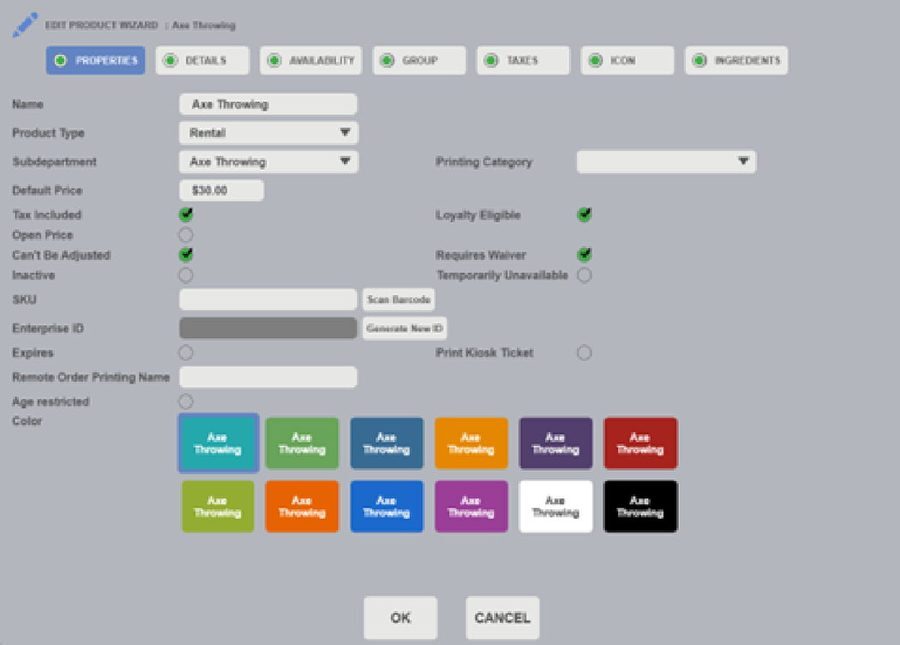
You will need to set up your attraction product to require a waiver. This is done inside of SYNC Office under Sales > Products. Once you have opened the product page, check the bubble that says, “Requires Waiver” and click “OK”.
Waiver – Guest Flow
If the guest has previously signed a waiver:
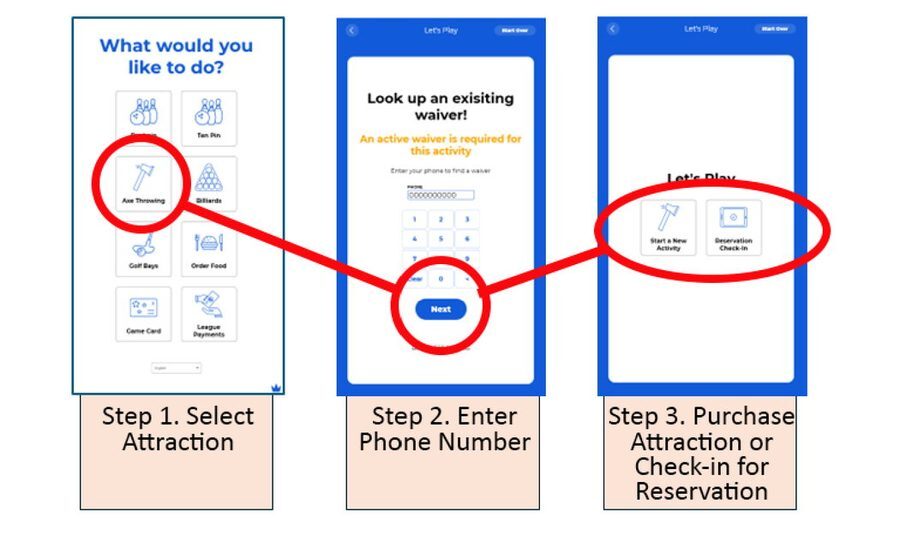
If the guest has not signed a waiver yet:
Related articles
- SYNC Self-Service Kiosk: Best Practices (overview)
- SYNC Self-Service Kiosk: Promoting Kiosk Use
- SYNC Self-Service Kiosk: Menu Building
- SYNC Self-Service Kiosk: Food Flow
- SYNC Self-Service Kiosk: Bowling Flow
- SYNC Self-Service Kiosk: League Payments
Need a hand?
South Pacific Bowling supports Brunswick SYNC across Australia, New Zealand and the South Pacific. Talk to us about kiosk configuration, menu building, attractor artwork, staff training or additional hardware.
1300 727 709 · support@southpacificbowling.com · southpacificbowling.com